| This page is currently being rewritten as part of the Online Quest Project. The page is being both written and checked. All users are welcome to make changes to the page. If you make a change that is relevant to the project, please update this template accordingly, and make sure you have observed the project guidelines. Detail
Quick Summary: written by Enodoc, not checked
Quest Stages: written by Tib, not checked |
|
Quick WalkthroughEdit
- Speak with Guildmaster Sees-All-Colors at the Fighters Guild in Vulkhel Guard (Auridon), Daggerfall (Glenumbra), or Davon's Watch (Stonefalls).
- Meet up with Merric at-Aswala and Aelif outside the city.
- Return to Sees-All-Colors.
- Locate Merric and Aelif near Skywatch (Auridon), Aldcroft (Glenumbra), or Ebonheart (Stonefalls).
- Talk to Aelif.
- Find the island tower.
- Talk to Merric.
- Report to Sees-All-Colors.
Detailed WalkthroughEdit
A New Singular PurposeEdit
Talk to Sees-All-Colors at the Fighters Guild. She tells you the guild has accepted a contract to defeat Dark Anchors, tendrils of Coldharbour. Two of the best guild members, Aelif and Merric, are investigating rumored anchors sites. She asks you to meet with them. You can ask her more about the two members or about the unusually large contract. All she will say about the benefactor is that she is powerful and doesn't like Daedra ruining lives.
You find Merric and Aelif fighting off a Worm Cultist. Talk to him. There won't be an Anchor where you are since the cultists have been defeated. However, he has heard of another one. He wants you to stay here with Aelif and search the cultists. When you search one of them, you are thrown back and a projection of a Dremora woman named Doshia appears.
- "Cease your meddling, scum! The Redguard's soul will fill the Mortuum Vivicus. Nothing you can do can stop it!"
Talk to Aelif about the vision. Aelif will warn him, while you tell Sees-All-Colors. The guildmaster asks you to find Merric and Aelif. She will rally the guild and investigate the Mortuum Vivicus.
You need to find Aelif first. When you approach her, she beckons you to join the fight, and Doshia summons Daedra. Help Aelif defeat three waves of Daedra, then find Merric. However, you are too late; Doshia casts a spell on Merric and they disappear. Talk to Aelif, who has run up behind you. She sees a location mentioned in one of the Worm Cultist's notes. She asks you to go there, while she gets the guildmaster and more help.
When you approach where Merric is being held, a ghost of a Nord beckons to you. It is Jofnir Iceblade, the former guildmaster. He asks you to save Merric and beware the followers of Molag Bal.
Dealing with DoshiaEdit
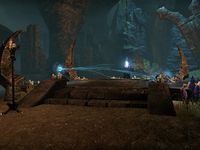
Enter Doshia's lair and defeat her. Be sure to bring potions, and don't let the floating orbs, known as the Feast, reach her. They heal her, but can also heal you.
Talk to Merric. He overheard her talking to Molag Bal about harvesting souls. He tells you to take Doshia's Journal from the table. It seems to be unintelligible. You can also read Notes on the Mortuum Vivicus, which say Molag Bal will consume Tamriel.
Talk to Guildmaster Sees-All-Colors. Once she has deciphered the journal, she will let you know. She thanks you for saving Merric by giving you a reward.
NotesEdit
- This quest starts in the *first* major town you encounter in your alliance's quest chain, and takes place in its surrounding province (Glenumbra / Daggerfall, Stonefalls / Davon's Watch, Auridon / Vulkhel Guard).
- If you are in a party, you will not have party support once you enter Buraniim/Dourstone Vault/Stonefang Cavern. You and your party members will each have to fight the imps and Doshia solo. So keep in mind of that.
- During this quest, Aelif will appear to other players (who are not sharing your quest) as a Khajiit with a different appearance, labeled "Guardian".
Quest StagesEdit
<Alias=LocationHold>) is dynamically set by the game and will be filled in with the appropriate word(s) when seen in game.
- Not all Journal Entries may appear in your journal; which entries appear and which entries do not depends on the manner in which the quest is done.
- Stages are not always in order of progress. This is usually the case with quests that have multiple possible outcomes or quests where certain tasks may be done in any order. Some stages may therefore repeat objectives seen in other stages.
