| This page is currently being rewritten as part of the Online Quest Project. The page is being both written and checked. All users are welcome to make changes to the page. If you make a change that is relevant to the project, please update this template accordingly, and make sure you have observed the project guidelines. Detail Quick Summary: not written
Quest Stages: not written |
| Help separate the souls of Gadris and Zur. |
| Zone: | Coldharbour |
|---|---|
| Objective: | The Vile Laboratory — Help Gadris and Zur reverse the soul-meld. |
| Quest Giver: | Gadris |
| Location(s): | The Vile Laboratory |
| Reward: | Soul-Meld Staff 572 Gold |

Quick WalkthroughEdit
- Talk to Gadris.
- Talk to Zur.
- Collect Zur's notes and tincture.
- Enter the laboratory.
- Squeeze through the rubble and find Gadris' notes.
- Gather the items and catalyst, and forge the antipodal rods.
- Meet Gadris at the Overseer's Atelier.
- Find the power crystal.
- Activate the machine.
- Take the Light of Meridia and leave the laboratory.
Detailed WalkthroughEdit
Two souls in one bodyEdit
On a platform near the Vile Laboratory you'll find a dunmer named Gadris who's seemingly talking to himself. Upon entering conversation, however, it turns out his soul is melted together with a khajiit named Zur's soul in some daedra experiment. When the conversation exits Gadris will transform into Zur, after which you need to start conversation once more. Zur will explain that to help, you need to get to a dwarven device that's hidden behind some rubble. Luckily, Zur can make a potion that allows you to pass but you need to gather his notes and tincture. He also explains you can't be teleported inside due to their lack of energy.
Obtaining the notes and tinctureEdit
Go over the south bridge leaving the platform. The first note Transmutation of Living Creatures is just around a wall near a bookcase guarded by a single zombie. The second note Transmutation Potion Recipe can be found a little bit more south on a stone fence. Follow the path behind the fence going up and follow that path north. There will be a stone building, inside, you can find Zur and the tincture. Optionally you can talk to Zur for a bit of extra conversation. Grab the tincture, and go to the entrance of the Vile Laboratory. The entrance is on the lower path next to the stone fence you previously visited. Enter the laboratory. Inside you see Gadris transforming into Zur again. Talk to Zur.
Crafting the antipodal rotsEdit
Wait for Zur to make his potion. Zur is done, he changes into Gadris again. Talk to Gadris. He tells you that once you're inside you should look for his notebook and follow its instructions on crafting antipodal rots. After an explanation of what that means, the conversation will end and you will automatically drink the potion causing you to change into a monkey. Use the broken pipes to maneuver around the room and to avoid the burning plateaus. Once you enter the metallurgy room you automatically return back into your regular self.
Read Gadris's notebook located in the middle of the room and collect the refined void salts, the ebony ore, and the Crystalline Essence Matrix from three of the corners of the room while killing the zombies and dwemer automation in the room. Return to the middle of the room to read the Catalyst Note. Once you approach the middle of the room, Zur will come in to say a few words. Go through the door on the south side. A flesh atronach named Phazkad protects the room. Kill him and grab the corrupted blood, then return through the door you came through. Now, go to the Force Furnace use it and the nearby weapon anvil to craft the antipodal rots. After this, go through the door on the north side of the room.
Unmelding the soulsEdit
Go through the hallway killing the dwemer automations on your path and talk to Gadris. He's rather tired but will reveal to you that only one of the two will be able to survive the unmelting and that the choice is up to you who that is. He tells you that he's grown rather fond of Zur, and can't advise because they both deserve equally to survive. He also tells you to look for a glowing crystal as it's used to power the device. Go inside and kill Overseer Xvarik who's guarding "the glowing crystal" which is, in reality, a light of Meridia. Grab the light of Meridia and walk to the other end of the room. There Gadris will appear, soon changing into Zur. Talk to Zur, place the crystal and the two rods. Now comes the irreversible choice. Save Gadris or save Zur.
Saving GadrisEdit
To save Gadris, use the left switch. Talk to him, grab the light of Meridia, and go outside. Talk to Gadris again. After this Gadris will mention he misses Zur and that he's ashamed that he judged Zur zo negative and tells you he was a good person. He will also tell you that he and Zur found out the dwarven device inside and the Molag Bal's Planemeld use the same principles. After this the quest will be completed and he will create a portal to the Hollow City.
If Gadris is saved, he will attend the war council if it hasn't taken place yet and join Gabrielle Benele's team during the final assault where he will give you a light spell for the dark chamber. Otherwise, he can be found in the dark alchemy labs in the Hollow city after the quest is completed.
Saving ZurEdit
To save Zur, use the right switch. Talk to him, grab the light of Meridia, and go outside. Talk to Zur again. Zur will tell you he feels lonely and misses Gadris, saying he used to dislike him but now feels like he misjudged him and is positive about Gadris. He will also tell you that he and Gadris found out the dwarven device inside and the Molag Bal's Planemeld use the same principles. After this the quest will be completed and he makes a portal to the Hollow City.
If Zur is saved, he will attend the war council if it hasn't taken place yet and join Gabrielle Benele's team during the final assault where he will give you a light spell for the dark chamber. Otherwise, he can be found in the dark alchemy labs in the Hollow city after the quests is completed. Zur will note that he keeps his notes much more tidy thanks to his time merged with Gadris.
GalleryEdit

Zur crafts the Transmutation Potion
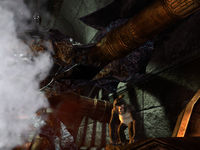
Get through the rubble to the Vile Laboratory
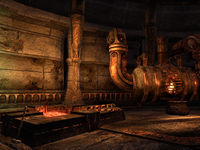
Search the Metallurgy Workshop for materials
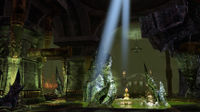
Forge the Antipodal Rods


NotesEdit
- Zur's notes and tincture won't exist in the ruins before starting the quest.
- The ingredients required for the procedure won't exist inside the metallurgy workshop before reading Gadris' notebook.
- While the catalyst note already exists and glows on the table upon first reaching the metallurgy workshop, it cannot be read until reaching the related objective.
- While accessible beforehand, Phazkad, his zombies and the vial of corrupted blood won't exist inside the experiment chamber until reaching the related objective.
- After completing this quest, the Dark Alchemy Lab in The Hollow City will unlock, and Gadris or Zur will be found living there.
BugsEdit
- The optional step to speak with Zur appears in the HUD right after completing the dialogue at the start of the quest, when it only becomes relevant when arriving at the tincture's location, where Zur actually appears again with further dialogue. ?
- Once you squeeze through the rubble, it is not possible to squeeze back to the other side, meaning the only way to exit early without continuing the quest is to use a wayshrine. When approaching the rubble behind you, the prompt to squeeze will appear but using it will simply put you back where you were, as if you had used the prompt from the entrance's side. ?
- The toxic gas during the monkey segment doesn't inflict damage when standing in it. ?
- When Zur appears in the metallurgy workshop when about to read the catalyst note, an objective marker appears above him. However, no optional step is added to the HUD to match this. ?
- After speaking with Zur, the marker is removed.
- Similarly, when Gadris appears in the metallurgy workshop after exiting the experiment chamber with the corrupted blood, an objective marker appears above him. However, no optional step is added to the HUD to match this. ?
- After speaking with Gadris, the marker is removed.
- Exiting the Overseer's atelier via the exit door back to Coldharbour without completing the objectives inside results in the same door becoming inaccessible from outside. This forces you to make your way back to the atelier, doing the monkey segment again on the way. ?
Quest StagesEdit
| The Soul-Meld Mage | |
|---|---|
| Finishes Quest | Journal Entry |
| The Dark Elf mage I was talking to transformed into a Khajiit. I should talk to him and get more details about their strange malady.
Objective: Talk to Zur | |
| The Dark Elf mage I was talking to transformed into a Khajiit. I should talk to him and get more details about their strange malady.
Objective: Collect Zur's Notes and Tincture
Optional Step: Talk to Zur | |
| I gathered Zur's materials. I should look for the entrance to the laboratory, where I hope to find him and Gadris.
Objective: Find the Entrance | |
| I should enter the laboratory and give the notes and tincture to Gadris or Zur. I'm not sure which one of the soul-melded mages will be available when I reach them.
Objective: Give Items to the Soul-Meld Mage | |
| I need to wait for Zur to craft a potion that will temporarily reduce my size so that I can squeeze through a hole in the rubble and enter the Vile Laboratory.
Objective: Wait While Zur Makes Potion | |
| Zur completed the potion that will make me small enough to slip through a gap in the rubble and enter the Vile Laboratory. I should talk to the soul-melded mage and get the potion.
Objective: Get the Transmutation Potion | |
| The potion turned me into a monkey! Now I can squeeze through the rubble and enter the ancient Dwarven laboratory.
Objective: Squeeze Through the Rubble | |
| I squeezed through the rubble and entered the Vile Laboratory. Now I have to find the Metallurgy Workshop.
Objective: Find the Metallurgy Workshop | |
| I made it to the Metallurgy Workshop and reverted back into my normal form. Now I need to find Gadris's notebook.
Objective: Read Gadris's Notebook | |
| Gadris listed the items necessary to make the antipiodal rods. I need to gather refined void salts, a crystalline essence matrix, and ebony ore from somewhere in this workshop.
Objective: Gather Ebony Ore
Objective: Gather Crystalline Essence Matrix
Objective: Gather Refined Void Salts | |
| I have the items from Gadris' notes, but he also mentioned a catalyst for the forging process. I should check to see if he left any notes on what this catalyst might be.
Objective: Read Catalyst Note | |
| According to Gadris' notes, corrupted blood would be the best catalyst for forging the antipodal rods. The experiment chamber should contain corrupted blood created by the Daedra. Some kind of monster guards the chamber, however.
Objective: Gather Corrupted Blood | |
| Now that I have the components and the catalyst to forge the antipodal rods, I should look for a furnace in the metallurgy workshop.
Objective: Melt the Components | |
| Now I need to forge the melted components into the antipodal rods. There must be a weapon anvil around here that I can use.
Objective: Craft the Antipodal Rods: x/2 | |
| I forged the antipodal rods for the Dwarven device that the Soul-Meld Mage told me about. I should make my way to the Overseer's workroom and meet up with Gadris or Zur.
Objective: Meet the Soul-Meld Mage | |
| I found Gadris near the door to the Overseer's workroom. I should talk to him and find out what I need to do next.
Objective: Talk to the Soul-Meld Mage | |
| I need to enter the Overseer's atelier and find the crystal that was used to power the Dwarven device.
Hidden Objective: Kill Overseer
Objective: Find the Power Crystal | |
| Now that I have the power crystal, I need to locate the device that melded Gadris and Zur's souls.
Objective: Find the Dwarven Device | |
| I found a strange-looking Dwarven device. This should be the machine that can reverse the soul-meld and set Gadris and Zur free. I should talk to the mage and get any final instructions.
Objective: Wait for the Soul-Meld Mage | |
| I need to place the crystal into the Dwarven device to provide the power necessary to separate the mages' souls.
Objective: Place the Crystal | |
| Two pillars connect to the Dwarven device. I need to insert an antipodal rod into each pillar. That should begin the process of reversing the soul-meld.
Objective: Insert the Right Antipodal Rod
Objective: Insert the Left Antipodal Rod | |
| The soul-meld is unraveling. The souls of the two mages have each been drawn to one of the antipodal rods. Now I need to pull one of the levers to save either Zur or Gadris.
Objective: Choose One Soul to Restore | |
| I decided to save Zur/Gadris. I should talk to him and see if he's recovered from the soul-meld reversal.
Objective: Talk to Zur/Gadris | |
| Zur/Gadris thinks that the powerful crystal attached to the device is one of the legendary Lights of Meridia. I should take the crystal.
Objective: Take the Light of Meridia | |
| Now that I have the Light of Meridia, I should find the exit door and leave this Vile Laboratory.
Objective: Leave the Laboratory | |
| I should meet Zur/Gadris outside the Vile Laboratory and speak to him.
Objective: Talk to Zur/Gadris | |
<Alias=LocationHold>) is dynamically set by the game and will be filled in with the appropriate word(s) when seen in game.
- Not all Journal Entries may appear in your journal; which entries appear and which entries do not depends on the manner in which the quest is done.
- Stages are not always in order of progress. This is usually the case with quests that have multiple possible outcomes or quests where certain tasks may be done in any order. Some stages may therefore repeat objectives seen in other stages.