| This article could benefit from an image of: event interior See Help:Images for information on how to upload images. Please remove this template from the page when finished. |
|

ObjectivesEdit
- Defeat the dremora warlock.
WalkthroughEdit
Before you begin, ensure that you can deal either Bashing or Shock damage. You will face Thalmor, Necromancers, and a Dremora Warlock within; this means you should be prepared to take Shock, Frost, and Fire damage (respectively) in this event. Aside from their weaknesses to those damage types and immunity to other damage types, the enemies within will be entirely typical.
Beginning the quest, you will find yourself in an Imperial fortress, complete and replete with banners. Follow the corridors, in which you may find food and small breakables, forward, then left, and then right. You will enter a room patrolled by a single Thalmor. The room may likewise contain food items, as well as breakable objects of varying size. Follow the corridor, in which you may find more food items to the right, and then turn left.
When you reach the end of the corridor, you will see a weapon rack trigger immediately opposite you. It opens the wall on the right side of the room, unlocking a secret area. In the main room, you will find breakables of varying size, food, and two patrolling Thalmor. If you are artless, you will have to face them both in succession, though the room is large enough that you should be able to evade the second after facing the first. Conversely, an artful player may be able to avoid both entirely—though the lack of visibility around the corner can be a hindrance thus. The room may also be littered with food and breakable objects.
The secret area consists of a relatively long corridor, in which may be more food and breakables. You must proceed until you see barred doors, at which point you must turn right to see a Silver Chest guarded by a Necromancer boss.
Continue ahead to the next corridor, which contains food and breakables of potentially larger sizes and is patrolled by a Thalmor. Proceed rightwards around the corner, and then leftwards to a room patrolled by two Necromancers. Be wary at this point, as the Necromancers may run around the corners to attack you by surprise, and if you are unfortunate you will be forced to face both in quick succession. Otherwise, you may well be able to avoid them both, at the risk of forgoing the food and breakables of up to moderate size in the room. Proceed to the corridor forward and right of where you entered, and follow it until you reach stairs. While it may contain food and small breakables, it is also patrolled by a Necromancer, whom it is not possible to avoid facing.
Head down the stairs and follow the corridor around leftwards. Be wary of the Thalmor and Necromancer who patrol the landing; you will face both in quick succession if you are careless and unfortunate. You may also, however, be able to bypass them both and continue down the next set of stairs to the final boss: a Dremora Warlock. Even if you are unable to entirely evade them, you will still be able to reach the boss to fight it first.
EnemiesEdit
- Thalmor Agents
- 5 standard
- Necromancers
- 4 standard
- 1 secret boss
- Dremora Warlock
- 1 boss
GalleryEdit
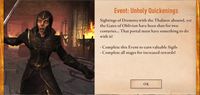
Sightings of Dremora with the Thalmor abound, yet the Gates of Oblivion have been shut for two centuries... That portal must have something to do with it!
- Complete this Event to earn valuable Sigils- Complete all stages for increased rewards!
