| This page is currently being rewritten as part of the Online Quest Project. The page is being both written and checked. All users are welcome to make changes to the page. If you make a change that is relevant to the project, please update this template accordingly, and make sure you have observed the project guidelines. Detail Quick Summary: written by Unk, checked by Solomon1972
Quest Stages: not written |
| An Orc seeks vengeance for her fallen clan in the Deadlands. |
| Zone: | The Deadlands |
|---|---|
| Objective: | Ardent Hope |
| Quest Giver: | Note for Khazasha |
| Location(s): | Ardent Hope |
| Reward: | Fist of the Kalmur Average Leveled Gold Title: Hope's Hero Achievement: Friend to the Kalmur |
| ID: | 6705 |

Quick WalkthroughEdit
- Read a note and find Khazasha near Ardent Hope.
- Enter the Citadel through the drainage grate.
- Follow the bear totem, Atrozu.
- Examine the area for clues.
- Search for a way into the Tower of Conviction.
- Solve the puzzle to activate The Machine.
- Enter the portal to the Vow Chamber.
- Read the Vow of Consumption.
- Defeat The Ravener.
- Enter the Lair of the Orb and approach the scrying orb.
- Talk to Khazasha and help her make a decision.
- Escape Ardent Hope through the portal.
- Talk to Khazasha.
- (Choice) Destroy the orb or keep it intact.
Detailed WalkthroughEdit
A note you find in the Deadlands will lead you to Khazasha near Ardent Hope. There, she will tell you of a creature called The Ravener that killed all but a few of her clan, before some Dremora killed more of them, leaving only herself as the last living member of Clan Kalmur. She asks for your help. She will use her clan's totem spirit, Atrozu, to track down the creature so you can kill it.
Inside, Atrozu will lead you on a merry chase across the outer ward of the Citadel. Halfway, you'll pause to talk to Kastav, who informs you of the creature's species: it's a dremnaken. Continuing north, you'll come to a locked gate. Find a way through by searching the path to the east of the gate. Once inside the courtyard, you'll face an Infernium before heading into the citadel proper: the Tower of Conviction.
Activating the machineEdit

The path through the Tower of Conviction is linear until you come to The Machine. You'll need to follow a precise series of steps in order to activate it. The following steps are numbered to match those on the UESP map (starting here).
- (1) Remove the first lucent from the Discharge Labrum.
- (2) Insert the first lucent to activate the portal to the upper level.
- (3) Use the portal to go up to the upper floor.
- (4) Pick up the second lucent.
- (5) Use the portal to go down to the main floor.
- (6) Charge the second lucent at the Dynamus Font located past the spike traps.
- (7) Use the portal to go up to the upper floor.
- (8) Insert the second lucent to activate the blocked door.
- (9) Go through the now-unblocked-door (to the Liber Armarium) and pick up the third lucent.
- (10) Exit the Liber Armarium and remove the second lucent (that was used to unblock the door).
- (11) Use the portal to go down to the main floor.
- (12) Remove the first lucent (that was used to activate the portal).
- (13) Charge the third lucent at the Dynamus Font located past the spike traps.
- (14) Place all three lucents in the Discharge Labrums at the machine.
The machine opens a portal to the Vow Room, where you'll read a treacherous contract, revealing just how vile this entire situation is for Clan Kalmur. Head out to the Savage Courtyard, where you'll fight the Ravener. Then head to the Lair of the Orb. Here, you'll need to help Khazasha make a choice: destroy the orb or preserve it. Make your choice, then head out through a portal she will provide to exit the citadel. Speak with her to complete the quest.
NotesEdit
- This quest is a prerequisite for the achievement Friend to the Kalmur, which grants the title Hope's Hero.
- The portal at the end of the quest says it leads back to the "Lair of the Ravener," but this is a misnomer; the lair is called the Lair of the Orb.
BugsEdit
- During the objective to the leave the Vow Chamber, the objective marker incorrectly points back to the portal that was used to access it rather than to the door ahead leading out to the Savage Courtyard. ?
GalleryEdit
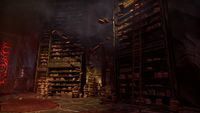
Library inside the Tower of Conviction
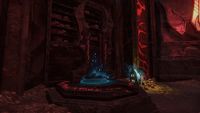
Portal powered by Lucents
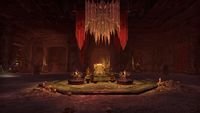
The Vow of Consumption
.jpg)


Quest StagesEdit
| Death Stalks the Weak | |
|---|---|
| Finishes Quest | Journal Entry |
| If I want to help Khazasha, I should look for her near Ardent Hope.
Objective: Talk to Khazasha | |
| I agreed to help Khazasha hunt down the Ravener. Atrozu, her clan's totem, can track the creature. She mentioned a drainage grate on the northern wall where I can slip inside and meet her.
Objective: Enter the Citadel Through the Drainage Grate | |
| I entered a drainage grate and found Khazasha waiting inside the Daedric citadel. We should follow Atrozu closely as he tracks the Ravener.
Objective: Follow Atrozu | |
| Atrozu led us to a large pit where we saw the Ravener performing a strange ritual with a dying prisoner. Our target disappeared before we reached it. I should speak to the prisoner to see what he knows.
Objective: Talk to Kastav | |
| Before Kastav died, he told me that the Ravener finds prey using an orb powered by blood. Occasionally he heard the creature roar from a tower in the north. I should search around to see if I can learn anything more.
Objective: Investigate the Ritual Site | |
| I discovered several interesting items: a disintegrating claw from the Ravener, Kastav's journal which mentions the Ravener losing his strength, and blood on the pedestal that held the orb. I should bring this information to Khazasha.
Objective: Talk to Khazasha | |
| I gave Khazasha the items I found, which strengthen her determination to take revenge. Atrozu once again found the Ravener's trail and began to chase it. I should follow the ghostly bear to find our prey.
Objective: Follow Atrozu | |
| Atrozu continues to track the Ravener, but a locked gate blocks our path. I should search the area to find a way around.
Objective: Find a Way Past the Gate
Objective Hint: Check Along the Wall
Objective Hint: Find Three Charged Lucents | |
| I discovered a tunnel burrowed through the courtyard wall. It's just wide enough that we can crawl through. I should use it to bypass the locked gate and continue tracking the Ravener.
Objective: Crawl through the Tunnel | |
| We made it through the tunnel and into the courtyard of a large tower. I should continue pursuing the Ravener's trail.
Objective: Enter the Tower | |
| As we approached the tower, we heard the Ravener's shouts come from within. Inside, we found stacks of books scattered everywhere. I should lead Khazasha and Atrozu up the tower in search of our prey.
Objective: Explore the Tower | |
| Atrozu sounds worried, and Khazasha appears concerned about our hunt. She paused and asked to speak with me. I should listen to what she has to say.
Objective: Talk to Khazasha | |
| Khazasha grows more obsessed with destroying the Ravener. She refuses to leave until she has her revenge. I should lead her and Atrozu up the tower until we find the creature.
Objective: Explore the Tower | |
| We reached a dead end but found a room with a strange machine. Khazasha believes activating it will allow us to proceed. I should find the missing components and turn it on.
Objective: Activate the Machine
Optional Step: Talk to Khazasha | |
| Activating the machine opened a portal. Khazasha's intuition tells her that we must enter it to find the Ravener. I should go through the portal to continue our hunt.
Objective: Enter the Portal | |
| Beyond the portal, we found an ornate room that looks like a ritual chamber. At the center is a lectern displaying a book. I should read the book for any clues.
Objective: Read the Vow of Consumption | |
| The book describes the Ravener's vow to hunt down Atrozu and devour him. It cannot stop until the hunt is complete. Khazasha appears distraught from this news. I should talk to her and learn her thoughts.
Objective: Talk to Khazasha | |
| Khazasha thinks that destroying the scrying orb should stop the Ravener from finding Atrozu. Perhaps starving it will destroy the creature. I should leave this vow chamber to continue exploring the tower..
Objective: Leave the Vow Chamber | |
| After leaving the vow chamber, we entered a large courtyard with ponds of lava. Atrozu warned us that the Ravener may be near. I should move quickly to find the scrying orb.
Objective: Search for the Scrying Orb | |
| I can see the Ravener's scrying orb just past a closed metal gate. I should enter so we can deal with the orb and destroy the Ravener for good.
Objective: Enter the Lair of the Orb | |
| Inside the lair, we found the scrying orb on top an ornate pedestal. I should get closer to examine it.
Objective: Approach the Scrying Orb | |
| We found the scrying orb unprotected. However, Khazasha's resolve seems to have waned for some reason. I should talk to her to learn her thoughts.
Objective: Talk to Khazasha | |
| Khazasha asked me to decide how to deal with the scrying orb. I recommended destroying it despite the cost of losing Atrozu. She regretfully agreed. I should smash the orb once she starts draining it.
Objective: Destroy the Scrying Orb | |
| We have destroyed the Ravener's scrying orb, dooming it to starvation. Khazasha used what remains of her power to open an escape portal. I should go through it to leave Ardent Hope.
Objective: Escape Ardent Hope | |
| We escaped Ardent Hope with our lives, but at the cost of Khazasha's totem spirit, Atrozu. I should speak with her for my reward. | |
| I gave Khazasha the items I found, which strengthened her determination to take revenge. Atrozu once again found the Ravener's trail and began to chase it. I should follow the ghostly bear to find our prey.
Objective: Follow Atrozu | |
| Khazasha asked for council on how to deal with the scrying orb. I advised leaving it intact so that Atrozu stays with her, even though it means the Ravener stays alive. I should pour this vial of her blood on it to drain its power so we can escape.
Objective: Drain the Scrying Orb | |
| Using her knowledge of blood magic, Khazasha weakened the scrying orb enough to escape without the Ravener finding us. She then opened a portal with the last bit of her power. I should enter it to escape Ardent Hope.
Objective: Escape Ardent Hope | |
| We escaped Ardent Hope with our lives and temporarily disabled the scrying orb by using Khazasha's blood. I should speak to her for my reward. | |
<Alias=LocationHold>) is dynamically set by the game and will be filled in with the appropriate word(s) when seen in game.
- Not all Journal Entries may appear in your journal; which entries appear and which entries do not depends on the manner in which the quest is done.
- Stages are not always in order of progress. This is usually the case with quests that have multiple possible outcomes or quests where certain tasks may be done in any order. Some stages may therefore repeat objectives seen in other stages.