| This place page is currently being rechecked as part of the Oblivion Remastered Project. The page is being checked in several stages to verify any changes due to the release of Oblivion Remastered. All users are welcome to make changes to the page. If you make a change that is relevant to the project, please update this template accordingly, and make sure you have observed the project guidelines. Details Walkthrough: not written Interior Remastered Images: not added |
|
|||
|---|---|---|---|
| # of Zones | 3 | ||
| Occupants | |||
| Dark Seducers, Golden Saints | |||
| Console Location Code(s) | |||
| XPCylarneExterior02, XPCylarne01Altar, XPCylarne01, XPCylarne02 | |||
| Region | |||
| Mania | |||
| Location | |||
| On the Isle of Flame, northwest of Hale | |||
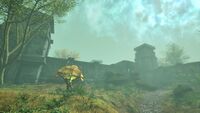
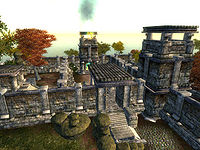
Cylarne is a large ruin on the Isle of Flame containing Golden Saints and Dark Seducers (quest-related). It contains three zones: Cylarne, Altar of Despair, Cylarne, and Cylarne, Underdeep.
Cylarne is the oldest ruin in the Shivering Isles, and it is rumored to be the former capital of the Isles. The ruins of Cylarne are home to the Cold Flame of Agnon, which is fed by the altars of Rapture and Despair. The Dark Seducers and Golden Saints are constantly fighting over controlling the ruin.
PeopleEdit
|
Related QuestsEdit
- The Cold Flame of Agnon: Choose sides in the battle at Cylarne to relight the hope of New Sheoth.
NotesEdit
- This ruin is inaccessible until you have begun the related quest.
- After the related quest is finished, the winning side will occupy both the exterior and the first zone with their own troops. The ruin will be completely accessible.
- For more information on Cylarne, see the Lore article.
BugsEdit
- If Chuna picks a fight with you after you insult her, Vika may flee from combat and unlock the quest-related gate. ?
ExteriorEdit
- The exterior is located at coordinates: SEWorld -10, 16
- This location's map marker (M on map) is named Cylarne (editor name XPCylarneMapMarker). The entrance door is NW of the marker, 120 feet away.
- Within the courtyard are multiple NPCs, who will appear at different times (all non-respawning):
- Vika (always)
- Aurmazl Kaneh (once the related quest starts)
- Chuna (always)
- Mirel (once the related quest starts)
- 4 anonymous Dark Seducers (if you help the Seducers win)
- 5 anonymous Golden Saints (once the related quest starts, removed after the battle)
- 4 anonymous Golden Saints (if you help the Saints win)
- 1 Knight of Order is near E (after the related quest)
- 1 Wilderness Creature (Mania) is near the entrance
- The following plants can be found near the entrance: 9 Alocasia plants, 6 Mushroom Tree Sapling plants, and 5 Worm's Head plants
- 1 Obelisk of Order is at location E on map (will activate after the related quest)
- 1 Chest (locked) is at F
Zone 1: Cylarne, Altar of DespairEdit
You will most likely enter this zone from Cylarne through door C and will need to head to door D in order to access the Underdeep. On your left as you enter is a Healing Urn, while 15 smaller urns containing Ashen Remains and possibly some jewelry and gems are placed around the altar. The altar itself is at Q on a high platform, guarded by two Dark Seducers.
The altar area will be a key battlefield during the related quest and once it is won, all surviving Mazken or Aureal will kneel next to it as their leader sacrifices herself to light it. The flame will remain lit thereafter, although this zone will be deserted once you finish the quest. The same will happen should you invite Ulfri to reposition her troops.
Treasure:
- 15 Urns
- 1 Urn (Healing)
- Some of the above items are clustered at the following locations:
- At E: 4 Urns
- At F: 4 Urns
Doors and Gates:
- There are two doors in/out of this zone
- 1 door (at C) leads to the zone Cylarne
- 1 door (at D) leads to the zone Cylarne, Underdeep
Other:
- 1 Altar of Despair at location Q on map
Zone 2: CylarneEdit
Once you have received the key to Cylarne from the gatekeepers, you will enter this zone through the door at Out. The first area is quite linear, so simply walk through it; the only thing of note being Stela, whom you will meet in the second corridor and will act as a follower within the ruin. The next room you enter explains why the Aureals have failed repeatedly to take Cylarne. You arrive on the lower level, a stone bridge looming ahead, connecting the two sides of the upper level of the room. Two archers are placed on the bridge, three other Seducers are at the far end of the room while two more patrol incessantly.
Head up the stairs to the north and move counterclockwise, crossing the bridge and arriving in a small area with two minor loot chests and another archer. Recross the bridge and return to the room with Ulfri, guarded by two bodyguards, and two urns. Heading west takes you back to the heavily defended room (the two scalon statue traps at T won't pose a threat). Go east instead, to door C which leads to the Altar of Despair.
If you decide to advise Ulfri to reposition her troops, this zone will be left with a patrolling Seducer, an archer on the bridge, one on the lower level and another in the higher side room. The guard in the first room will also stay put.
Occupants:
- Grakedrig Ulfri (non-respawning)
- Stela (non-respawning)
- 7 Dark Seducer archers (non-respawning)
- 7 Dark Seducers (non-respawning)
Treasure:
- 1 Chest (locked)
- 1 Chest (Healing)
- 2 Urns
- 3 Urns (Healing)
Traps:
- 2 Scalon Statue traps at locations T on map
Doors and Gates:
- There are two doors in/out of this zone
- 1 door (at Out) leads outside
- 1 door (at C) leads to the zone Cylarne, Altar of Despair
Zone 3: Cylarne, UnderdeepEdit
When entering this zone from door D, go down the stairs and jump off the bridge into the room below, making sure not to miss the chest to the south. The various cave in (F) and scalon statue (E) traps in this room and the next will not shoot at you, and can be activated once the battle starts from the push block in the second room's upper level. Once you reach the push block, head south and then west to find the only seducer in the zone. Stay on the upper level and you will arrive in an area which overlooks the final room, with a push block giving you the opportunity to activate the darts traps at G. Head over the bridge and outside to the Aureal's encampment through door Out.
If you advise Ulfri to reposition her troops, the Underdeep's defenses will be beefed up. Two Mazken will be placed on the bridge next to door D, with another in the room to the side and a fourth in the room with the cave in traps. Ulfri and another Seducer will be found in the central room, while Stela and another soldier on the bridge near Out.
Occupants:
- 1 Dark Seducer archer (non-respawning)
Treasure:
- 2 Chests (1 locked)
- 2 Urns
- 4 Urns (Healing)
- 1 Urn (Healing)
Traps:
- 5 Scalon Statue traps at locations E on map
- 4 Cave In traps at F
- 4 Darts traps at G
Doors and Gates:
- There are two doors in/out of this zone
- 1 door (at Out) leads outside
- 1 door (at D) leads to the zone Cylarne, Altar of Despair

