| This place page is currently being rechecked as part of the Oblivion Remastered Project. The page is being checked in several stages to verify any changes due to the release of Oblivion Remastered. All users are welcome to make changes to the page. If you make a change that is relevant to the project, please update this template accordingly, and make sure you have observed the project guidelines. Details Walkthrough: not written Interior Remastered Images: not added |
| Oblivion World: Kvatch Oblivion World (lore page) | |
|---|---|
| # of Peripheral Towers | 4 |
| # of Non-Random Caves | 1 |
| Important Treasure | |
| |
| Console Location Code | |
| Worldspace: OblivionMQKvatch OblivionMqKvatchCave OblivionMqKvatchCitadel OblivionMqKvatchCitadelHall01 OblivionMqKvatchCitadelHall02 OblivionMqKvatchCitadelLord OblivionMqKvatchSmallTower01 OblivionMqKvatchSmallTower02 OblivionMqKvatchSmallTower03 OblivionMqKvatchSmallTower04 | |
| Fixed Gate | |
| Gate outside Kvatch (map) | |


Kvatch Oblivion World is a large Oblivion World only encountered at Kvatch (quest-specific).
The Oblivion Gate in front of Kvatch always connects to this world. The name of this region is later revealed to be "Ganonah" by the Dremora Kathutet.
When you first enter the world through the gate, the main tower is directly in front of you to the north. However, a War Gate prevents you from taking the direct route to the tower across a bridge, so you will need to take a longer route along the western side of the island.
Related QuestsEdit
- Breaking the Siege of Kvatch: You must help defeat the Daedra invaders and end the siege of Kvatch.
NotesEdit
- The four dead Kvatch guards on the bridge do not have any displayed names when targeted.
ExteriorEdit


Upon entering the world, you will see the main Sigil Keep looming in the distance to the north. However, the bridge that leads directly to it has a pair of closed War Gates (H) in the middle, so you will need to take an alternative path. Straight in front of you, on the near side of the bridge, are two Daedra enemies. Another Daedra is just to the northwest, fighting Ilend Vonius (V). Rescue Ilend and decide whether to send him back to the city or for him to follow you. Before pressing on to the northwest, return to the entrance and proceed northeast. Cross a semi-sunken bridge and defeat two Daedra to access a Fleshy Pod.
Follow the northwestern path as you make your way up the western side of the island, battling past Daedra, dodging Harrada plants (yellow dots on map), and looting the occasional Fleshy Pod. Once the path turns east and you find a tower (Meat Harbor) looming ahead, there are a number of paths you can take:
- For the quickest route to the Sigil Keep (The Blood Feast), head east past the tower by taking either the northern or southern paths. You will need to battle past one or two Daedra and evade a few Land Mine traps (m).
- Heading south past the tower and a blazing firepit will lead you to the base of another tower, the Blood Well.
- Heading north from the tower and then northwest past another firepit leads you to a path running along the entire northern side of the island. Following it all the way clockwise will eventually lead you to The Blood Feast. Along the way you will find the entrance to the Sump of Misery in the northeastern part of the island.
From the base of The Blood Feast, you can head straight down to the south, making your way past a Claw Trap (s) and some Dremora and Daedra enemies. This path eventually leads you to the bridge visible when entering the world. The War Gates in the middle can be opened from inside the Blood Well; if the gates are opened, you will find four dead Kvatch guards (K) on the bridge between the gates. Alternatively, you can head southeast from The Blood Feast past the Reapers Sprawl tower. After negotiating a few Daedra enemies and land mines, you will reach a Fleshy Pod.
Occupants:
- Ilend Vonius at location V on map
- 24 Daedra (of which 22 always best possible level)
- 1 Dremora Scout
- 1 Stunted Scamp
- 4 Kvatch Guards (dead) at K
Treasure:
- 4 Fleshy Pod Ext
- 1 Fleshy Pod (Healing)
- 2 Fleshy Pod Sacks
- The following weapons will always be found: 1 Iron Claymore, 1 Silver War Axe, 1 Steel Mace, and 1 Steel Longsword
Plants:
- Plants are marked by yellow dots on map
- 157 Blood Grass plants
- 47 Harrada plants
- 59 Spiddal Stick plants
- 4 Blood Grass plants, 1 Harrada plant, and 4 Spiddal Stick plants are in inaccessible locations
Traps:
- 4 Avalanche traps at locations a on map
- 3 Claw Traps at s
- 8 Land Mine traps at m
Doors and Gates:
- There are eight doors in/out of this zone
- 1 Oblivion Gate (at OG) leads to Tamriel
- 1 door (at A) leads to the zone Blood Well (Z1)
- 1 door (at B) leads to the zone Meat Harbor (Z2)
- 3 doors (at C) lead to the zone The Blood Feast (Z3)
- 1 door (at D) leads to the zone Sump of Misery (Z4)
- 1 door (at E) leads to the zone Reapers Sprawl (Z6)
Other:
- 2 War Gates at locations H on map
Blood WellEdit

The Blood Well is in the southwestern corner of the world and has an entrance at ground level. You will begin on the lowest level of the tower, which hosts a Daedric occupant and a Corpse Masher lift which takes you to the middle of the tower. Make your way upwards, past numerous hanging corpses, until you reach the summit. Here you will find another Daedric occupant, a Blood Fountain (b), and a Geared Batten (C) which opens the world's two War Gates (H on exterior map) and allows you to loot the four dead Kvatch guards between the gates.
Occupants:
Doors and Gates:
- There is one door (at A) in/out of this zone, leading outside
Other:
- 1 Blood Fountain at location b on map
- 1 Geared Batten at C, highest level
Meat HarborEdit

Meat Harbor is a satellite tower of The Blood Feast, and is reached by exiting from door A in the Corridors of Dark Salvation and crossing a narrow bridge.
You will enter almost at the top of the tower, where you will find a Daedric occupant and a large amount of burning and hanging corpses. Make your way down until you reach a broken Corpse Masher lift. Nearby are two The Punished containers guarded by another Daedric occupant.
Occupants:
Treasure:
Doors and Gates:
- There is one door (at B) in/out of this zone, leading outside
The Blood FeastEdit

The Blood Feast is the Sigil Keep of this world, with its entrance in the northern part of the island. On entering from door Out, you will be in the lowest level of the tower, where you will find two Magicka Essences (m) guarded by two Daedra. From here, use either of the doors at A to enter the Rending Halls.
When returning from the Rending Halls via the doors at B, make your way up the tower, dispatch the nearby Dremora, and use either of the doors at C to enter the Corridors of Dark Salvation. Returning from the Corridors via the doors at D gives you access to a balcony area with two The Punished containers.
When instead returning from the Corridors via door E, you will find yourself on the fifth level of the tower. Head upwards and dispatch a Dremora Mage, then use the Runed Portal at F to teleport to the sixth level. After looting a The Punished container, head upwards and battle past a Dremora and a Daedra to reach the doors at G, both of which will lead you to the same room in the Sigillum Sanguis. The western door is very easy-locked, while the eastern door is easy-locked; both are opened by the Sigil Keep Key.
Occupants:
- 3 Daedra (always best possible level)
- 2 Dremora (always best possible level)
- 1 Dremora Mage (always best possible level)
Treasure:
Doors and Gates:
- There are twelve doors in/out of this zone
- 1 door (at Out) leads outside
- 2 doors (at A, first level) lead to the zone Rending Halls (M2)
- 2 doors (at B, second level) lead to the zone Rending Halls (M2)
- 2 doors (at C, third level) lead to the zone Corridors of Dark Salvation (M3)
- 2 doors (at D, fourth level) lead to the zone Corridors of Dark Salvation (M3)
- 1 door (at E, fifth level) leads to the zone Corridors of Dark Salvation (M3)
- 2 doors (at G, seventh level; both locked, opened by the Sigil Keep Key) lead to the zone Sigillum Sanguis (M4)
- Note that two doors (one each of C and D) are located directly above each other and thus appear as a single door on the map. The two portals at F are similarly located on top of each other.
Other:
- 2 Magicka Essences at locations m on map
- 1 Runed Portal at F, fifth level (teleports you to the sixth level)
- 1 Runed Portal at F, sixth level (teleports you to the fifth level)
Rending HallsEdit

Upon entering from the lowest level of The Blood Feast via either of the doors at A, make your way up the corridor. In the next room are a Dremora and a Daedric occupant as well as a Blood Fountain (b). Take either of the doors at B to return to the second level of The Blood Feast.
Occupants:
- 1 Daedric occupant (Daedra or Dremora; always best possible level)
- 1 Dremora (always best possible level)
Doors and Gates:
- There are four doors in/out of this zone
- 2 doors (at B) lead to the zone The Blood Feast, first level (M1)
- 2 doors (at A) lead to the zone The Blood Feast, second level (M1)
Other:
- 1 Blood Fountain at location b on map
Corridors of Dark SalvationEdit

After entering from the third level of The Blood Feast via either of the doors at C, head up the corridor into a room with two Daedra and a broken Citadel Spike trap which has impaled an unfortunate Stunted Scamp (s). Both the doors to the south (F) and north (G) require a key, so head outside via door B, which gives you access to a narrow bridge which leads southeast to Reapers Sprawl.
Once you've returned with the Sigil Keep Key, unlock the southern door and head down the corridor. Dispatch a Daedric occupant and use the doors at D to access the fourth level of The Blood Feast. Once back, head north instead, and after negotiating another Citadel Spike trap (S) and a Daedric occupant, you will arrive at door E, which leads to the fifth level of The Blood Feast.
If you press on to the east you will arrive at another corridor with two Citadel Spike traps (controlled by the Claw Lever triggers at L) and a Daedric occupant. Beyond them is door A, which gives you access to a narrow bridge which leads southwest to an optional tower, Meat Harbor.
Occupants:
- 2 Daedra (always best possible level)
- 3 Daedric occupants (Daedra or Dremora; always best possible level)
- 1 Stunted Scamp (dead) at location s on map
Traps:
- 4 Citadel Spike traps (1 broken) at locations S on map
- 2 Claw Lever triggers (activate Citadel Spike traps) at L
Doors and Gates:
- There are seven doors in/out of this zone
- 2 doors (at C) lead to the zone The Blood Feast, third level (M1)
- 2 doors (at D) lead to the zone The Blood Feast, fourth level (M1)
- 1 door (at E) leads to the zone The Blood Feast, fifth level (M1)
- 1 door (at A) leads outside to a bridge to the zone Meat Harbor (Z2)
- 1 door (at B) leads outside to a bridge to the zone Reapers Sprawl (Z6)
- 2 Doors at F and G (both locked, key required, opened by the Sigil Keep Key)
Sigillum SanguisEdit

This is the final zone of this world, comprising a single large room over three levels. Upon entering from The Blood Feast via either of the doors at G, you will find yourself in a corridor with a Blood Fountain (b) before emerging in a large circular room. On the lowest level are two Magicka Essences (m), while on the second are a Dremora Mage and two The Purified containers. The third and final level hosts a boss-level Dremora (A), a boss The Purified container (B), and the world's Sigil Stone (S). As soon as you take the stone, you will be transported back to the area in front of the Kvatch city gate.
Occupants:
- 1 boss-level Dremora (always best possible level) at location A on map
- 1 Dremora Mage (always best possible level)
Treasure:
- 1 random Sigil Stone at location S on map
- 1 boss-level The Punished at B
- 1 The Punished 01
- 1 The Punished (Healing)
Doors and Gates:
- There are two doors (at G) in/out of this zone, both leading to the zone The Blood Feast, seventh level (M1)
Other:
- 1 Blood Fountain at location b on map
- 2 Magicka Essences at m
Sump of MiseryEdit


The Sump of Misery is a cave in the northeastern part of the island. This small zone is composed of two rooms linked by two short corridors. In the first room you will find a hanging Fleshy Pod guarded by a Daedra. The northern alcove hosts another hanging Pod also guarded by a Daedra, while in the room to the southeast you will find two Fleshy Pod Bags. Throughout the zone are seven aggressive Harrada plants (yellow dots on map) which will swipe at you when you come close. Use door A to access the Desolate Well.
Occupants:
- 2 Daedra
Treasure:
Plants:
- Plants are marked by yellow dots on map
- 7 (aggressive) Harrada plants
Doors and Gates:
- There are two doors in/out of this zone
- 1 door (at A) leads to the zone Desolate Well (Z5)
- 1 door (at D) leads outside
Desolate WellEdit

The Desolate Well is a ruined tower which can only be entered via door A in the Sump of Misery. You will emerge on the lowest level of tower, where two Daedric occupants guard a Corpse Masher lift. Pull the nearby lever and jump onto the lift, which brings you to the middle section. Make your way up the tower, passing a number of hanging corpses. At the top is another Daedric occupant, two The Punished containers (one of which, at B, is a boss container), a Blood Fountain, and more hanging corpses.
Occupants:
Treasure:
- 1 boss-level The Punished at location B on map
- 1 The Punished 02
Doors and Gates:
- There is one door (at A) in/out of this zone, leading to the zone Sump of Misery
Other:
- 1 Blood Fountain at location b on map
Reapers SprawlEdit


Reapers Sprawl is a satellite tower of The Blood Feast, and is reached by exiting from door B in the Corridors of Dark Salvation and crossing a narrow bridge.
You will enter almost at the top of the tower, where you will find Kvatch guard Menien Goneld (M) locked inside a Brood Cage (C). Guarding him is the Dremora Sigil Keeper (S), who also carries the key which opens the two locked doors in the Corridors of Dark Salvation. There is no way to release Menien from his prison.
Two further Daedric occupants are at the very bottom of the tower: either snipe at them from above or call the Corpse Masher lift and descend to fight them at close quarters.
Occupants:
- 1 Dremora Sigil Keeper at location S on map
- 2 Daedric occupants (Daedra or Dremora)
- Menien Goneld at M
Doors and Gates:
- There is one door (at E) in/out of this zone, leading outside
Other:
- 1 Brood Cage at location C on map
GalleryEdit

Ruined structures in the distance, only present in Oblivion Remastered
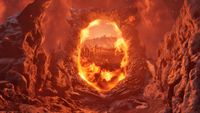
The Gate to Kvatch

