| This page is currently being rewritten as part of the Online Quest Project. The page is being both written and checked. All users are welcome to make changes to the page. If you make a change that is relevant to the project, please update this template accordingly, and make sure you have observed the project guidelines. Detail Quick Summary: written by Oath2order, Talyyn, checked by Kallykat
Quest Stages: written by Oath2order, checked by Talyyn |
|
||||||||||||||||||||
Quick WalkthroughEdit
- Speak with Khud af-Hadajja and enter Doomvault Porcixid.
- Locate the body of Morgane and take her Sending Stone.
- Search the Doomvault for the Daedric device and destroy it.
- Exit the Doomvault and talk to Khud.
Detailed WalkthroughEdit
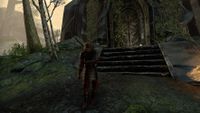
Approaching Doomvault Porcixid you'll find Khud af-Hadajja outside, wounded and poisoned. He will regale you with a sad tale of loss. His guildmate, Morgane, was killed while the two of them attempted to fulfill a Fighters Guild contract to destroy an unknown Daedric device. He asks you to find his partner's Sending Stone inside the vault so he can guide you through finding the device.
Inside, it can feel like a bit of a maze, if you're not paying close attention to the map, especially since the individual sub-zones were not given unique names in-game. You can see all the maps of the sub-zones at the Doomvault Porcixid page, here
First Room: EntrywayEdit
Head straight through the first room, a small entryway. (You will drop down into this room at the end of the quest.)
Second Room: Morgane CavernEdit
This leads into a large cavern, where you'll find the body of Morgane. Search her for the sending stone and Khud will talk through it. Investigate a point in this cavern, then head straight west to exit this chamber through the door at the center west.
Third Room: Octagonal RoomEdit
Walk in and investigate a point inside the octagonal room. If you've already acquired the skyshard for this delve, then continue straight through to the west to reach Skyshard Cavern. If not, then walk right back out to the east, back to the Morgane cavern. Turn north and exit the Morgane cavern by the northwest exit to reach the L-Shaped Hallway.
Fourth Room: L-Shaped HallwayEdit
Assuming you need to acquire the skyshard, this is the connecting hallway you'll encounter after exiting the Morgane cavern by the northwest exit. Simply traverse this hallway to reach the next large cavern.
Fifth Room: Skyshard CavernEdit
If you arrived here via the L-Shaped Hallway, carefully go around the corner to find the skyshard (drop down after finding the skyshard). Regardless, the next step is to head west through this skyshard cavern, staying along the north side. Keep an eye out for several Elite Enemies, including watchers and iron atronachs. At the west end, investigate a point, then turn south and head back to the east end of the map, staying along the south side. You'll find the exit at the southeast corner of the map.
Sixth Room: Boss and MachineEdit
You're now in the final sub-zone of the delve. Defeat Karzikon the Razorsworn and keep following the hall to reach The Machine. Talk to Khud again, then destroy The Machine by interacting with the controls on the west side of the platform. You will hear Mehrunes Dagon yell at you but ignore him and move north to find the drop-down that brings you back to the first room.
Head outside to talk with Khud to complete the quest.
- "Welcome back, comrade. Did you … did you destroy the machine?"
- Yes, I found and destroyed the Daedric device.
- "Good. Good. I couldn't leave until I knew ….
You did well, comrade. Better than Morgane and I, at any rate. You would have liked her, I think. Hmm. Here's your pay. The Fighters Guild, and all of Blackwood, thank you for your efforts."
You will receive some gold and the Warped Oblivion Leggings for your efforts.
Quest StagesEdit
| A Battle of Silk and Flame | |
|---|---|
| Finishes Quest | Journal Entry |
| I should enter the doomvault.
Objective: Enter the Doomvault | |
| I should look for the body of Khud af-Hadajja's comrade, Morgane. According to Khud, she carries a sending stone that will allow us communicate.
Objective: Find Morgane | |
| I should take Morgane's sending stone. It might allow me to make contact with her partner, Khud af-Hadajja.
Objective: Take the Sending Stone | |
| I should search the doomvault for any sign of the Daedric device. When I find anything of interest, I should contact Khud with the sending stone.
Objective: Investigate the Doomvault: 0/3 | |
| According to Khud af-Hadajja, the device is very close. I need to find it.
Objective: Find the Daedric Device | |
| I found the strange Daedric machine. Now, I must destroy it.
Objective: Destroy the Daedric Device | |
| I destroyed the Dagon-worshipers' device. I should make my way back to Khud af-Hadajja to inform him of my success.
Objective: Exit the Doomvault | |
| I should speak with Khud af-Hadajja and let him know what happened in the doomvault.
Objective: Talk to Khud af-Hadajja | |
<Alias=LocationHold>) is dynamically set by the game and will be filled in with the appropriate word(s) when seen in game.
- Not all Journal Entries may appear in your journal; which entries appear and which entries do not depends on the manner in which the quest is done.
- Stages are not always in order of progress. This is usually the case with quests that have multiple possible outcomes or quests where certain tasks may be done in any order. Some stages may therefore repeat objectives seen in other stages.
