| This page is currently being rewritten as part of the Online Quest Project. The page is being both written and checked. All users are welcome to make changes to the page. If you make a change that is relevant to the project, please update this template accordingly, and make sure you have observed the project guidelines. Detail
Quick Summary: not written
Quest Stages: written by Profcinders, Talyyn, not checked |
|
||||||||||||||||||||

Quick WalkthroughEdit
Detailed WalkthroughEdit
Starting the QuestEdit
To begin this quest, you can either speak with Elhalem who can be found north of the Prowl. He will direct you to his boss, who can be found at the ranch down the road. After a recent Dragon attack, poachers have moved into the nearby hunting grounds, and the ranch needs help to stop them.
- "Welcome to the Prowl, friend! Lovely, eh? We sure could use some help to keep it that way."
- What do you need?
- "A bloody Dragon swept through here recently. Can you believe that? Burned out a decent chunk of the Prowl, and ate up the animals too. Now, a flock of poachers have moved in to kill the few beasts we have left!
We could really use some help." - What kind of help do you need, exactly?
- "Wait, does that mean you're in? Really? Z'en's price, that's good to hear.
I work on a ranch east of here, just past the ridgeline. Talk to the owner, Numaia. She'll give you all the details and get you sorted. Thanks again, friend!" - All right, I'll go speak to Numaia now.
Otherwise, you can talk to Numaia directly, she can be found to the east of The Prowl's location marker.

- "Hold there, poacher! One more step, and my sweet boy will tear you apart!
Come on, Milksop! Get up! Ah! You're useless." - I'm not a poacher. What's going on here?
- "Ugh. I am sorry. Numaia grows suspicious of everyone these days.
A dragon swept through recently, you see? Gobbled up whole herds of antelope and burned out the larger hunting camps. Now, Bonechime poachers pitch their tents all over the prowl." - You keep mentioning these poachers. Who are they, and what risk do they pose to you?
- "We care for many rare animals. A juicy target, yes?
Just yesterday, a group of them stole this one's training whistle. To lure out our beasts, you see? We have little gold, but Numaia would pay you to retrieve her whistle and punish those muskarses!" - All right, I'll retrieve your whistle and break up the Bonechime poachers' operation.
Before you leave, you can ask her about the ranch and her animals.
Dealing with the Bonechime GangEdit


The objectives are best tackled anti-clockwise starting from the top right, as this is closest to where you start. Each camp is guarded by at least one group of Bonechime poachers, and you must destroy two sets of Poacher Supplies and set fire to the Poacher Tent for the camps to count as destroyed.
Near the third camp, you can also pick up a Skyshard by a ruined wall, and the Meirvale Fragment in a small canyon to the west.
Numaia's Training Whistle can be found in a larger camp than the others, alongside a note from the poachers' leader, Rahti.
Once you have completed your tasks, you can return to the ranch to deliver the whistle.
An Audacious RaidEdit

Upon your return, you will find that the Bonechime Gang were not idle. Numaia's ranch will be on fire and several of her animals, including her beloved Milksop will be have been taken during the raid. Talk with the distraught Numaia and she will ask for your help to rescue the animals.
- "Thank the Moons, you are back. The poachers! They—they took them!"
- Slow down. Took who? What happened?
- "While you set fire to the poachers' camps, they launched a raid on the ranch. We tried to fight them off, but there were just too many of them!
They took my sweet boy, Milksop! Honeydew and Sugar-Belly, too. S'rendarr curse them!" - Where did they take the animals?
- "In lean times, they gather in the ruins to the west, along with their leader, Rahti. You destroyed their smaller encampments, so they must be there.
Most of the walls collapsed centuries ago, but the ones that still stand are mountain-strong." - Any suggestions on how to get in?
- "Let me thing …. Ah! Marmalade! This one's pet monkey, not the preserve.
She is very swift and very sneaky. If you use Numaia's training whistle—the one you just recovered—she might be able to help you." - All right, I'll deal with Rahti and rescue your animals.
- "My best ranch hand, Elhalem, will accompany you. He has sharp eyes and knows the Prowl better than most.
I hope we are not too late. If something happens to this one's sweet boy, Milksop …. Oh, Numaia would never forgive herself."
Numaia will give you her whistle, so you can call for Marmalade's help. Additionally, the ranch hand Elhalem will accompany you to the Bonechime Outpost.
Bonechime Outpost Rescue MissionEdit
Once you reach the ruins that make up Bonechime Outpost, freeing Lavender and Honeydew is relatively simple. Lavender is guarded by a couple of poachers, who are easily dispatched. Honeydew can be found on a raised platform that you can't reach - but Marmalade can, and blowing the whistle you were given summons her to unlock the cage for you.
Moving on to the second two beasts to free, you need to head inside the ruin's walls. Marmalade will open the door for you. The outpost is formed of a small maze of walls, with a set of poachers at every other turn. You eventually reach Sugar-Belly and free her from her cage, and once more Marmalade will help you through a door by stealing its key from a nearby sleeping guard.
The second part of the outpost is much like the first, with more enemies and more winding walls. At the end, you'll find Milksop in a large cage, and Rahti the Peeler, the poachers' leader, sheltering under a canopy. Free Milksop and you can head straight back to the ranch. Killing Rahti doesn't contribute towards the quest, and he's a fairly strong enemy if you're at a low level. Once you do, you can find the poachers' ledger, Beast Acquisitions Log, at his table.
Back at the RanchEdit
Once you have freed the stolen animals, you can return to Numaia. She will be pleased that all the animals made their way back safely.
- "There is Numaia's favorite ranch hand! When Milksop and sneaky Marmalade returned, this one knew you would not be far behind."
- I rescued the animals. Did they all make it back safely?
- "They did. Numaia's sweet boy is a little shaken. Hopefully a hearty meal and a nice, long chin scratch will settle his nerves, yes?
You have this one's deepest thanks, walker. Milksop's too! Say thank you, sweet boy! Go ahead, now. Oh, never mind!"
You will receive some gold and a pair of Poacher's Grips.
GalleryEdit
-
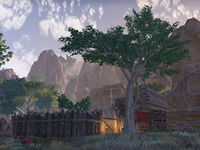
Bonechime Outpost
-
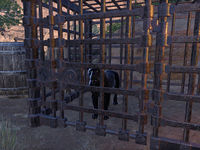
Free Lavender
-
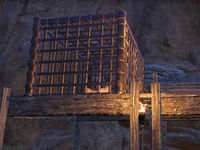
Marmalade freeing Honeydew
-
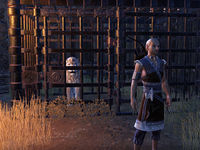
Milksop and Elhalem


Quest StagesEdit
| Preserving the Prowl | |
|---|---|
| Finishes Quest | Journal Entry |
| I should talk to the local wildlife ranch's proprietor, Numaia.
Objective: Talk to Numaia
|
|
| I should destroy the Bonechime Gang's poaching camps and recover Numaia's Training Whistle.
Objective: Destroy Poacher Camps: 0/3
Objective: Recover the Training Whistle
|
|
| I destroyed the Bonechime Gang's poacher camps and recovered the Training Whistle. I should deliver it to Numaia.
Objective: Talk to Numaia
|
|
| The Bonechime poachers attacked the ranch while I was raiding their camps in the Prowl. They seized Numaia's animals and dragged them off to their primary encampment. I need to rescue these beasts and kill the poachers' leader, Rahti the Peeler.
Objective: Rescue Lavender
Objective: Rescue Honeydew
|
|
| The Bonechime poachers must have taken the rest of Numaia's beasts inside the outpost. I should gain entry and search inside.
Objective: Enter Bonechime Outpost
If I use Numaia's training whistle, Marmalade will probably help me open the Outpost Gate.
Objective Hint: Unlock the Outpost Gate
|
|
| The Bonechime poachers probably caged Numaia's senche lioness, Sugar-Belly, in the outpost somewhere. I need to find and free her.
Objective: Rescue Sugar-Belly
|
|
| Another locked gate lies between me and Numaia's prized senche lion, Milksop. A drunken guard almost certainly holds the key. I should call for Marmalade again. She might be able to help.
Objective: Whistle for Marmalade
|
|
| Marmalade plucked the key off the drunken guard and dropped it down for me. I should pick it up.
Objective: Acquire the Key
|
|
| I have the key to Rahti's Command Post. I should use it to enter the innermost section of the Bonechime Outpost.
Objective: Search for Milksop
|
|
| I found Numaia's prized senche lion, Milksop. I should set him free.
Objective: Rescue Milksop
|
|
| I freed all the animals from the Bonechime Outpost. I should return to the ranch and speak to Numaia.
Objective: Talk to Numaia
|
|
<Alias=LocationHold>) is dynamically set by the game and will be filled in with the appropriate word(s) when seen in game.
- Not all Journal Entries may appear in your journal; which entries appear and which entries do not depends on the manner in which the quest is done.
- Stages are not always in order of progress. This is usually the case with quests that have multiple possible outcomes or quests where certain tasks may be done in any order. Some stages may therefore repeat objectives seen in other stages.