| This page is currently being rewritten as part of the Online Quest Project. The page is being both written and checked. All users are welcome to make changes to the page. If you make a change that is relevant to the project, please update this template accordingly, and make sure you have observed the project guidelines. Detail Quick Summary: not written
Quest Stages: not written |
| Help protect Greenshade from Daedra. |
| Zone: | Greenshade |
|---|---|
| Objective: | Rootwater Grove — Restore peace to Rootwater Grove. |
| Quest Giver: | Fongoth, Orthenir |
| Location(s): | Rootwater Grove, Ilmyris |
| Reward: | Circlet of the Wooded Eye High Leveled Gold |
| XP Gain: | High |
| ID: | 4575 |
Quick WalkthroughEdit
Detailed WalkthroughEdit
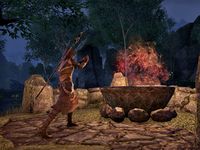
The forest is angry due to an impending Daedric invasion. You activate three wardstones around the grove to protect it. However, you are too late to stop the invasion.
Orthenir reveals that the grove is home to a secret library of Herma-Mora. You go to Ilmyris to bind the Daedra. Inside, you find the Hall of Memories, Saromir and a shrine to Hermaeus Mora. You defeat the Khajiit, the High Elf, and the Imperial souls, which were set free when their bindings were loosened. The Bosmer soul escaped, and you can choose to replace the soul with Saromir. If you choose to kill him and have the persuasion perk, you can convince Saromir to kill himself. If you refuse to kill Saromir, Hermaeus Mora will kill Orthenir instead, and you must defeat his soul.
Once a soul has been provided, Hermaeus Mora provides you a vision of Pelidil, Laryaril and Saromir. They found the Heart of Valenwood at Hectahame. Return to the shrine for your reward.
NotesEdit
- Daedra will start to appear out of red summoning symbols to ambush you in the grove after you activating a second wardstone.
- They will cease to appear in the grove once the ritual to reinstate the wards is completed.
- During the objective to defeat the watcher, the objective description states the watcher is attacking Orthenir when in fact it floats idly in the pond behind him.
- The escaped souls won't exist in the ruins before reaching the related objective.
- The objective description after seeing the Ayleid crystal vision incorrectly states Prince Naemon was shown when it only shows Saromir, Pelidil and Laryaril
BugsEdit
- There is no audio to match the subtitles displayed for Orthenir's dialogue after activating a second wardstone. ?
- The Daedra and the wildlife they are summoned near to will both just stand idle while the Daedra drain their health instead of fighting each other actively. ?
- The interaction prompt for Hermaeus Mora's shrine is inconsistent, requiring you to look specifically at the outer edges of the stone rim rather than the center of the shrine itself where the quest marker points to. (both 1st and 3rd person)
Quest StagesEdit
| The Flooded Grove | |
|---|---|
| Finishes Quest | Journal Entry |
Objective: Talk to Orthenir | |
Hidden Objective: Activate the Wardstones | |
Objective: Activate Wardstones | |
Objective: Return to Orthenir | |
| I need to defeat the Watcher attacking Orthenir in Rootwater Grove before we can finish the ward.
Objective: Defeat the Watcher | |
Objective: Complete the Ritual | |
Objective: Find the Vault of Memories | |
Objective: Talk to Saromir | |
Objective: Activate Hermaeus Mora's Shrine | |
Objective: Defeat the Khajiit Soul | |
Objective: Defeat the Altmer Soul | |
Objective: Defeat the Imperial Soul | |
Objective: Activate the Runestone | |
<Alias=LocationHold>) is dynamically set by the game and will be filled in with the appropriate word(s) when seen in game.
- Not all Journal Entries may appear in your journal; which entries appear and which entries do not depends on the manner in which the quest is done.
- Stages are not always in order of progress. This is usually the case with quests that have multiple possible outcomes or quests where certain tasks may be done in any order. Some stages may therefore repeat objectives seen in other stages.
