|
||||||||||||||||||||

Quick WalkthroughEdit
- Talk to Daluion and enter Zenithar's Abbey.
- Search for clues as to where the Golden Anvil is.
- Go to each of the three stalls to find locations of sigil keys.
- Recoveer the three sigil keys.
- Unlock and enter the adytum.
- Speak to Arbitrator Gavos Douar.
- Speak to Daluion.
- Touch the Golden Anvil.
- Exit the abbey and talk to Daluion.
Detailed WalkthroughEdit
Outside Zenithar's Abbey stands a Redguard Resolute of Zenithar named Daluion looking at a map. Speak to him to find out what he is looking for. He tells you that he seeks the Golden Anvil, which was transformed from iron into a golden anvil blessed with "divine prosperity" by Zenithar.
Daluion goes on to tell you about Zenithar's Abbey. It was once a great bazaar where people exchanged objects, ideas and pieces of their culture, and where the foreign was valued. The abbey was corrupted by Gavos Douar, an Arbitrator for the bazaar who ultimately abused his power. Gavos was overthrown, but the anvil was never recovered. You and Daluion are to enter the abbey and recover the anvil.
Search for CluesEdit
After entering the abbey speak to Daluion:
- "The history of this abbey and its fall into ruin remain clouded in mystery. All I know for certain is that the Golden Anvil was never recovered.
We should search for surviving records from Gavos's time. Some trail to follow, however waterlogged."
You will start by searching for three clues to the anvil's location while fighting your way through trolls and minotaurs. Heading southeast or northeast around the curving path you will come to the first clue, the Tattered Trader's Log, that mentions a strange tree sap imported by the trader. The trader was worried that Gavos will not let him trade it in the bazaar.
The next two clues are located behind two doors to the north and south. Select one door and continue your search in the abbey grounds and the abbey cloister.
The clue to the north, a Rebel's Faded Letter, tells of a plot by one of Gavos' soldiers to imprison him.
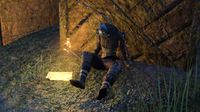
To the south is a Lovingly Written Note on the ground next to a fallen soldier, which describes how Gavos hid in a locked adytum which was then sealed by three trade ministers.
Once you have found all three clues speak to Daluion. He agrees with your theory that the anvil is locked in the adytum and that more clues might be found in the bazaar. He says the booth locations of the three trade ministers, Ralos, Quentin, and Esdir, may be found in a bazaar directory.
Lovingly Written Note
The Faded Letter
The Tattered Trader's Log


Search the BazaarEdit
Head back into the cloister and search the area on the map where you will find the bazaar directory. It lists the locations of Magister Quentin's Menagerie in the South-Eastern Bazaar, Exalted Esdir's booth in East-Central Bazaar, and Relics by Ralos in the North-Western Bazaar.

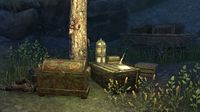
Go through the door to the east and you will find Ralos' stall just after the path curves to the north. Read Ralos' Charred Jounal on the cart. It tells of how the three arbitrators paid the guards to lock Gavos Douar in the adytum with the anvil. His key to the adytum is in a decrepit chest in a stall east of Esdir's hideout.
Go to the next search area and you'll find Esdir's Old Journal, which says his sigil is hidden high above the busy streets. He didn't trust Ralos and Quentin, and he had a skooma shipment coming in that he won't share with the other two. You will find his key in a lockbox on a platform to the south.

Quentin's Secret Correspondence is a letter to that details a plan to sell the anvil to the letter's intended recipient. Quentin was supposed to meet them behind the forging fires. It also begs urgency for fear that others may get to the anvil first. His key is buried on the north side of the bazaar next to a furnace.
Investigate the Golden AnvilEdit
The entrance to the Abbey is in the northeast corner of the map. Use the three keys to enter the abbey, and you will see the anvil on a pedestal. Arbitrator Gavos Douar will then approach you.
- "It seems I've finally paid my penance to Zenithar for letting this glorious place crumble. Oh, so many years, alone. But I never gave up.
- How did you survive being imprisoned in here?
- "Honest toil. Zenithar provides to those who work. Just as the seal kept out the war that raged between the trade-ministers, the cracks let in the rain, and the roach, and the rays of the sun. These were my wages for care of the anvil, and prayer."

Gavos says he hid the anvil away because it was becoming pitted and corroded from all of the "avarice, opulence and depravity" in the abbey. He claims he had to do it to protect it from those that sought to use it for their own benefit. You must now talk to Daluion about what to do next. He thinks Gavos is telling the truth and that Zenithar hasn't abandoned the abbey. Daluion says the anvil will continue to fade until Zanithar's faith in the people is renewed.
You must now work to return the abbey to glory in order for Zenithar to believe the abbey is worthy of redemption and renew his blessing upon them. Lay your hand on the anvil while Daluion prays to Zenithar. As he does so, the anvil begins to shine, showing that the prayer has succeeded.
Follow Daluion and Gavos outside and speak with Daluion, who praises you for your help and says he could not have done it without you. He then presents you with your reward.
Quest StagesEdit
| The Golden Anvil | |
|---|---|
| Finishes Quest | Journal Entry |
| I agreed to help search for the Golden Anvil. I should enter Zenithar's Abbey.
Objective: Enter Zenithar's Abbey | |
| Daluion suggested we search for clues within Zenithar's Abbey to unearth the ultimate fate of the Golden Anvil.
Objective: Search for clues: 0/3
Optional Step: Talk To Daluion | |
| I have uncovered several clues about the history of Zenithar's Abbey. I should discuss them with Daluion.
Objective: Talk to Daluion | |
| Daluion suggested I check the directory at the bazaar to determine the shops of the three merchant lords mentioned in the documents we recovered.
Objective: Investigate the Bazaar's Directory | |
| The directory noted the location of all three merchant lords' shops, I should investigate them for more information regarding the anvil's potential location to see where the trails lead.
Objective: Find the Sigil Keys: 0/3 | |
| I have all of the sigil keys required to open the magically sealed adytum. I just need to unlock it.
Objective: Use the Sigil Keys to Unlock the Adytum | |
| The merchant lords sigil keys unsealed the adytum allegedly housing the Golden Anvil.
Objective: Enter the Adytum | |
| We discovered an anvil within the adytum, but it's seen better days. I should take a closer look with Daluion.
Objective: Investigate the Golden Anvil | |
| Arbitrator Gavos Douar appears to have survived his time locked away in the adytum. I should speak with him to learn more about what happened here.
Objective: Talk to Arbitrator Gavos Douar | |
| I spoke with Gavos about the downfall of the abbey and the deterioration of the anvil. I should speak with Daluion about what we learned.
Objective: Talk to Daluion | |
| Daluion believes we can begin restoring the Golden Anvil through a show of good, honest labor and trade before Zenithar. He asked me to place my hand on the anvil when I'm ready to begin.
Objective: Pray with Daluion at the Faded Anvil | |
| The deal I made with Daluion seems to have a positive effect on the Golden Anvil. With the seal on the adytum broken, Gavos wishes to see the outdoors again. Daluion and I should escort him out the rear doors.
Objective: Exit Zenithar's Abbey | |
| Arbitrator Gavos Douar is finally freed from his wrongful imprisonment and the Golden Anvil rediscovered by the Resolutes of Zenithar. I should speak to Daluion about what comes next.
Objective: Talk to Daluion | |
<Alias=LocationHold>) is dynamically set by the game and will be filled in with the appropriate word(s) when seen in game.
- Not all Journal Entries may appear in your journal; which entries appear and which entries do not depends on the manner in which the quest is done.
- Stages are not always in order of progress. This is usually the case with quests that have multiple possible outcomes or quests where certain tasks may be done in any order. Some stages may therefore repeat objectives seen in other stages.