|
||||||||||||||||||

| This quest is currently disabled (as of Update 44) It has been replaced with a revised Soul Shriven in Coldharbour. |
Quick WalkthroughEdit
- Speak to Norianwe for information about your arrival to the isle.
- Exit the cell and talk to Norianwe.
- Pick up a weapon of your choice.
- Practice your fighting skills with the Animated Armor.
- Talk to Norianwe and head outside the ruins.
- Make your way to the Keywright's Gallery.
- Find a skyshard to unlock the gate inside the gallery.
- Enter the antechamber and defeat a dangerous Daedric beast.
- Proceed deeper into the gallery.
- Speak to Norianwe about your discovery.
Detailed WalkthroughEdit
When you wake up (map), you find yourself locked behind bars in a ruin on the Isle of Balfiera. Speaking with Norianwe will allow you be set free. Norianwe is a member of the Sinderill, an agency of spies and scholars. She asks for your assistance in dealing with a threat to the island. Portals in the Keywright's Gallery opened, recently, admitting you and a deadly Daedra called a Harvester. After you select and equip a nearby weapon, Norianwe will lead you out of the opening area.
- When equipping a weapon, mixing the weapons will not allow you to move forward with the quest; you'll need to equip both daggers, for example, or the sword and shield, but not a sword and a dagger.
- There are a number of urns in this opening area (indeed throughout the map!), if you wish to collect the helpful items inside before leaving.
In the next area, Norianwe will animate a training asset to give you a chance to practice combat. Afterward, if you wish, you can tell her you'd like to fight again. Then it's off to find the Daedra. Upstairs, you'll have an opportunity to use Sneaking to get past one of the "stray golems" under the control of the Daedra. You can either fight the golem and pick a trivial lock to enter the Balfiera Armory, or you can sneak in order to turn left and bypass the armory. If you decide to bypass the armory (by turning left), you'll still have a chance to select a set of light, medium, or heavy armor from armor stands in the hall before exiting outside.
- If this is your first time playing ESO after playing Oblivion or Skyrim, you need to know that the act of sneaking will not "raise your Sneak skill," so there's no need to delay your progress with excessive sneaking near the creature.
- The armory has a large number of items in it, so you'll need to pick and choose which items to take. (If you've previously unlocked a ragpicker, merchant, or banker, they are not usable in this Zone.)

As you battle your way across the courtyard, Norianwe will provide some assistance, such as with healing. When you enter the gallery, she discovers that the power source to proceed further (a skyshard) has been damaged, so you'll need to acquire a new one. Finding the Skyshard Vault to the south, you'll fight a gargoyle to get to another skyshard. Upon trying to retrieve the skyshard, you'll absorb its power, surprising Norianwe. She'll direct you back to the door where the broken skyshard was, and you'll repair the gate to the Gallery Antechamber.
Inside the antechamber, you'll fight Shyazzel the Traveler. Pay attention during the fight, as there may be an opportunity to destroy several orbs called The Feast before they heal her. After defeating her, you'll enter the Keywright's Gallery. Don't miss the large number of bookshelves, here, which includes skill books. The gallery is dominated by a now-exposed arcane helix. Norianwe conjectures that you are the reason. This conversation completes the quest. From here, you can choose one of several locations to which to teleport, concluding your time on the isle.
Leaving BalfieraEdit
After completing the quest, Norianwe encourages you to enter one of the portals. These are all one-way trips; there is no way to return to the ruins. Select each portal and Norianwe will give you a short summary of what you can find there. For first-time players, you will only be given a single option.
- First-time players must go to the tutorial zone for your chosen Alliance:
- Stros M'Kai (if member)
- Khenarthi's Roost (if member)
- Bleakrock Isle (if member)
- Players who only own the base game (which includes Morrowind) have one additional choice when going through the tutorial on a second character:
- Vvardenfell (arrive onboard The Windstorm in Seyda Neen)
- Players who have bought the relevant chapter or are ESO Plus subscribers can also choose:
- Summerset Isle (arrive at Eldbur Sanctuary)
- Elsweyr (arrive outside Star Haven Adeptorium)
- Greymoor (arrive outside Deepwood Vale)
- Blackwood (arrive at Telepe)
- High Isle (arrive at Druid's Gate)
- Telvanni Peninsula (arrive at the Tomb of the Nameless Master)
- West Weald (arrive at Skingrad Vineyards Wayshrine)
GalleryEdit
Keywright's GalleryEdit
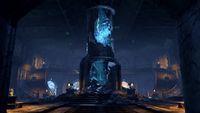
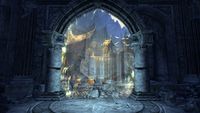
The arcane helix
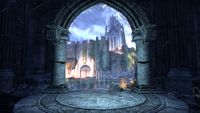
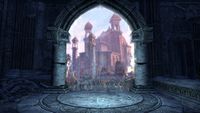
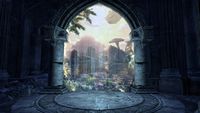
Portal to Blackwood
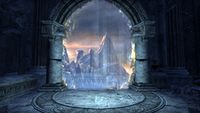
Portal to Bleakrock Isle
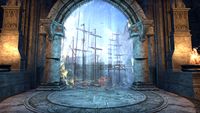
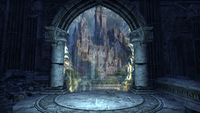
Portal to High Isle
Portal to Khenarthi's Roost

Portal to (Northern) Elsweyr
Portal to Stros M'kai
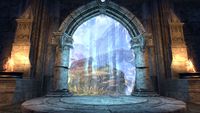
Portal to Summerset Isle
Portal to the Telvanni Peninsula
Portal to Vvardenfell

Portal to Western Skyrim


NotesEdit
- If you log out during the tutorial, Norianwe will often have left the room, causing you to miss any remaining dialogue she had during the scene. This happens after you practice combat against the Animated Armor, but before you leave the prison. If you want to practice more than once by talking to Norianwe again, don't log out. Likewise, she will disappear after turning in the The Gates of Adamant quest and logging out. Before then, if you approach a gate, Norianwe will narrate with more information about its destination.
- If you go back inside Balfiera Ruins after going outside with Norianwe, the dungeon is reset, so you can pick up three more free sets of armor and search all the urns again.
- This tutorial replaced the Chapter-specific tutorial quests Broken Bonds (Morrowind), The Mind Trap (Summerset), Bright Moons, Warm Sands (Elsweyr), and Bound in Blood (Greymoor). The original starter-tutorial quest, Soul Shriven in Coldharbour remains, in slightly altered form, still accessible through meeting the Benefactor in a starter city (Daggerfall, Vulkhel Guard or Davon's Watch).
Quest StagesEdit
| The Gates of Adamant | |
|---|---|
| Finishes Quest | Journal Entry |
| I heard a voice. I should look around to find out who's speaking.
Objective: Look Around | |
| I spied an Elf on the other side of my cell door. I should speak with her.
Objective: Talk to Norianwe | |
| I should wait for Norianwe to open the cell door.
Objective: Wait for Norianwe to Open the Door | |
| Norianwe unlocked the door. I should exit my cell.
Objective: Exit Cell | |
| I successfully escaped my cell. I should follow my liberator, Norianwe.
Objective: Follow Norianwe | |
| Norianwe wants to speak with me before we proceed. I should talk to her and find out what she wants.
Objective: Talk to Norianwe | |
| Norianwe wants to make sure I can defend myself. I should pick up a weapon.
Objective: Take a Weapon | |
| I claimed a weapon. Now, I should equip it.
Objective: Equip a Weapon
Optional Step: Equip an Off-Hand Item | |
| With my weapon equipped, I'm ready to fight. I should follow Norianwe to the next room.
Objective: Follow Norianwe | |
| I should defeat the magical construct that Norianwe summoned.
Objective: Practice Combat | |
| Now that I defeated her magical construct, I should talk to Norianwe about what to do next.
Objective: Talk to Norianwe | |
| I should make my way to the surface and meet Norianwe outside.
Objective: Lead Norianwe Outside | |
| Norianwe seems confident that the source of this incursion is a mysterious vault called the Keywright's Gallery. We should make our way there.
Objective: Find the Keywright's Gallery | |
| A locked gate blocks our progress. I should talk to Norianwe about what to do next.
Objective: Talk to Norianwe | |
| According to Norianwe, we need a fresh skyshard to open the gate. I should collect one from a nearby vault so we can repair the gate mechanism.
Objective: Acquire the Skyshard | |
| I absorbed the power of a skyshard. I should return to the Gallery foyer and use this power to repair the gate.
Objective: Return to the Gate | |
| I must use the power of the skyshard to repair the gate.
Objective: Repair the Gate | |
| I repaired the gate. Now, I should talk to Norianwe about what to do next.
Objective: Talk to Norianwe | |
| With the gate repaired, we're free to progress further into the ruin. I should enter the gate and see what lies beyond.
Objective: Enter Gate | |
| As soon as I passed through the gate, I encountered the Daedric monster, Shyazzel. I should defeat this creature.
Objective: Defeat Shyazzel the Traveler | |
| I killed Shyazzel the Traveler. Now, I should enter The Keywright's Gallery.
Objective: Enter the Keywright's Gallery | |
| The Keywright's Gallery is full of magic doorways! I should talk to Norianwe to find out what she knows about this strange chamber.
Objective: Talk to Norianwe | |
| I found my way to the Keywright's Gallery with the help of Norianwe. I should talk to her about what to do next.
Objective: Talk to Norianwe | |
<Alias=LocationHold>) is dynamically set by the game and will be filled in with the appropriate word(s) when seen in game.
- Not all Journal Entries may appear in your journal; which entries appear and which entries do not depends on the manner in which the quest is done.
- Stages are not always in order of progress. This is usually the case with quests that have multiple possible outcomes or quests where certain tasks may be done in any order. Some stages may therefore repeat objectives seen in other stages.